This article provides an overview of how to record a narrated presentation from within PowerPoint 365. Instructions maybe different on older versions of the software.
Enable recording in PowerPoint
Before you start recording, the first step is to enable the Recording features with PowerPoint. To do this:
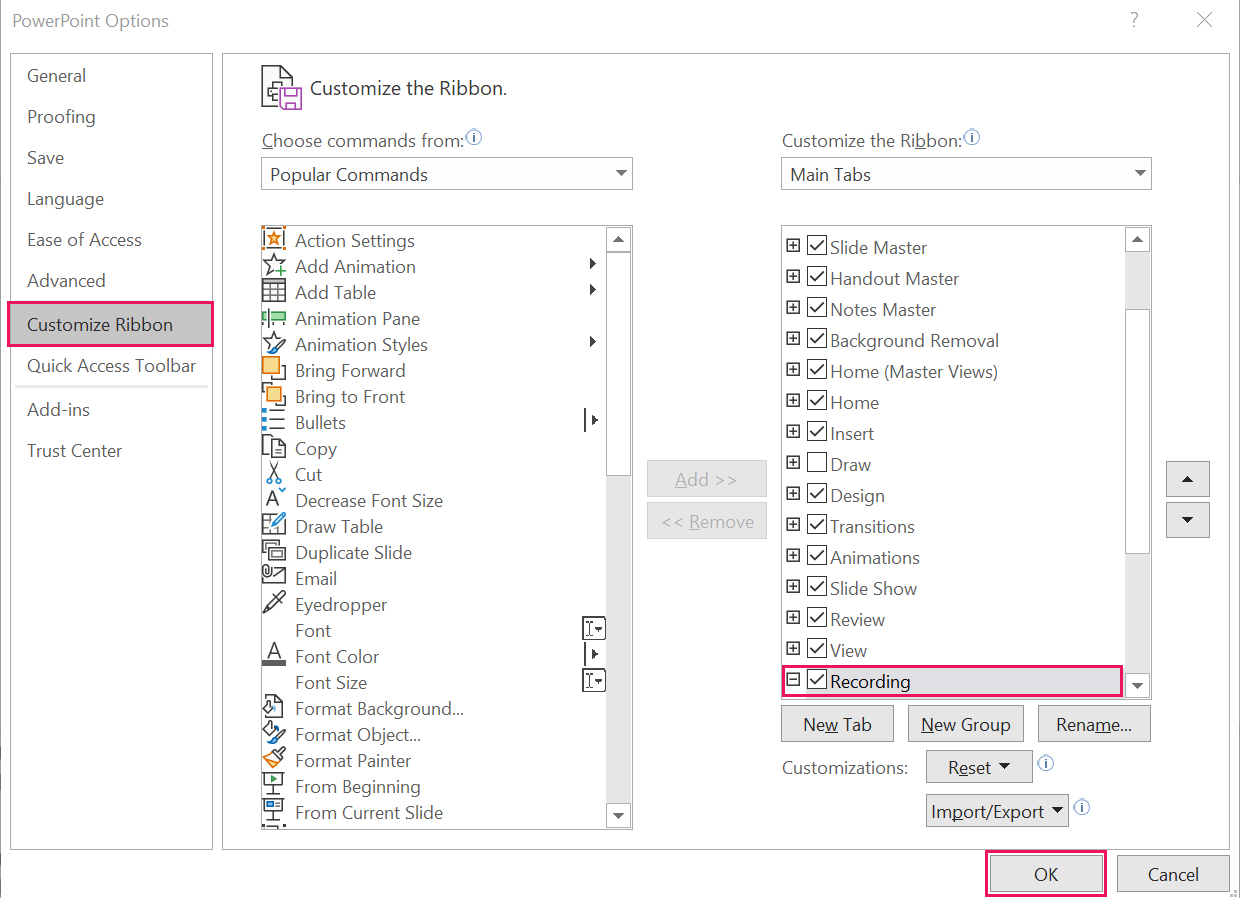
- Click the File tab on the PowerPoint ribbon and select Options from the menu. This will open the PowerPoint Options dialog box.
- From the menu, select Customize Ribbon.
- From the list of available ribbon tabs, select the Recording check box and then OK.

You should now see the Recording tab on the PowerPoint ribbon.

Recording in PowerPoint
From within PowerPoint, you can Record from Current Slide or Record from Beginning , depending on your requirements.
Follow these simple steps to record in PowerPoint:
- Click Record Slide Show from the Recording tab, and select either Record from Current Slide or Record from Beginning. This will open the presentation in the Recording window, the current slide is shown in the main pane.
-
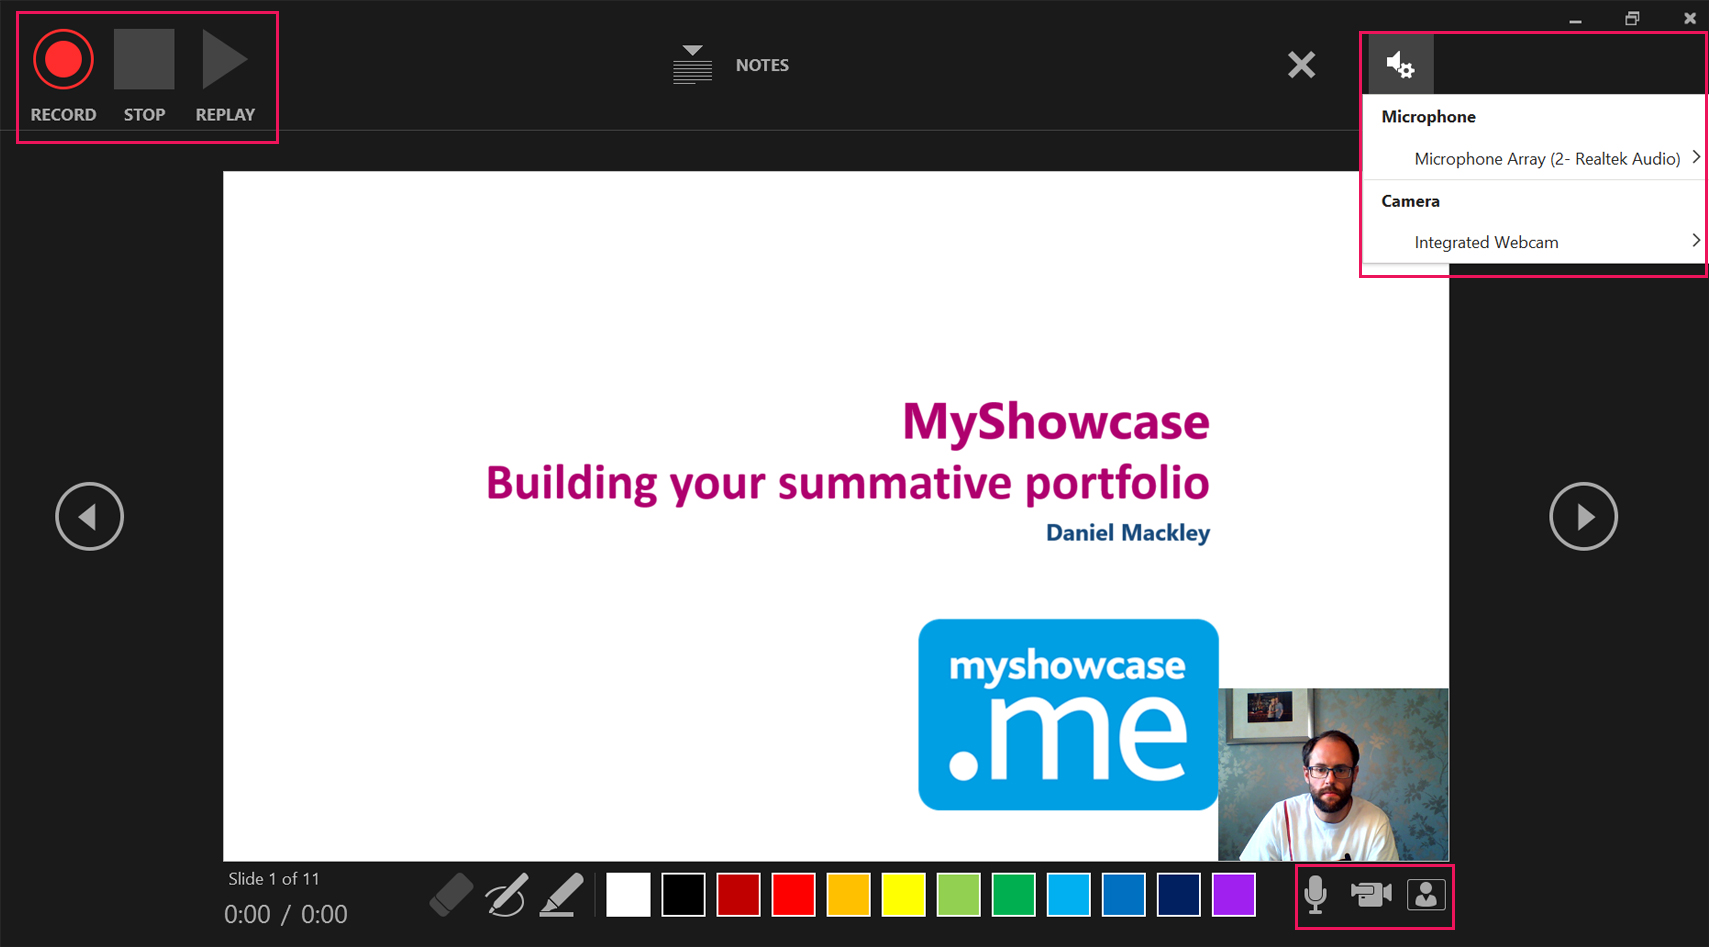
- The buttons in the top-left of the screen are for starting, stopping and pausing the recording.
- The settings in the top-right allow you to configure your microphone and camera.
- You can record audio or video narration as you run through your presentation. The buttons at the lower-right corner of the window allow you to toggle on or off the microphone, camera, and camera preview.
- If you use the pen, highlighter, or eraser, PowerPoint also records those actions. You can pick a pointer tool (pen, eraser, or highlighter) from the array of tools just below the current slide.
- Click the round, Record button (or press R on your keyboard) when you are ready to start the recording. You will get a 3 second countdown.
- Record you narration for that slide.The navigation arrows on either side of the current slide allow you to move to the previous and next slides.
-
- You may find it easier recording the narration for each slide individually rather than recording the whole presentation in one take. Recordings are added to the presentation on a per-slide basis, so if you want to change a recording, you only have to re-record the affected slide or slides. Also, you can rearrange the order of slides after recording without having to re-record anything. This also means it’s easy to pause for a break while recording a presentation.
- PowerPoint doesn’t record audio or video during transitions between slides, so don’t speak while advancing the slide. For this reason we recommend you don’t include transitions in your presentation. Also, include a brief buffer of silence at the beginning and the end of each slide to make the transitions smooth and ensure that you don’t cut off audible narration while transitioning from one slide to the next.
- To end your recording, select the square Stop button (or press S on your keyboard). When you finish recording your narration, a small picture appears in the lower-right corner of the recorded slides. The picture is an audio icon, or, if the web camera was on during the recording, a still image from the webcam.
Preview the recorded presentation
In the Recording window, the triangular Play button near the top left corner lets you preview the recording of the slide that currently has the focus in that window.
In Normal view (PowerPoint), click the sound icon or picture in the lower-right corner of the slide, and then click Play.
Remove audio / video narration from your presentation
After previewing your recording, you can delete any audio / video narration from the recording that you either don’t want or that you would like to record again. From the Recording tab on the ribbon, you can either clear narration on the current slide or all the slides. To do this:
- Click Record Slide Show and scroll to Clear at the bottom of the menu. From the sub-menu you have the option to Clear Narration on Current Slide or Clear Narrations on All Slides.
Publishing your presentation as video
Once you have finished recording your narration, the next step in the process is to export the presentation as a video file. Before you do this make sure you have saved the PowerPoint file (in presentation format .pptx), select File from the ribbon and from the menu Save.
To save your presentation file as a video, follow these simple steps:
- From the PowerPoint ribbon, click File > Export > Create a Video. Alternatively, on the Recording tab of the ribbon, click Export to Video.
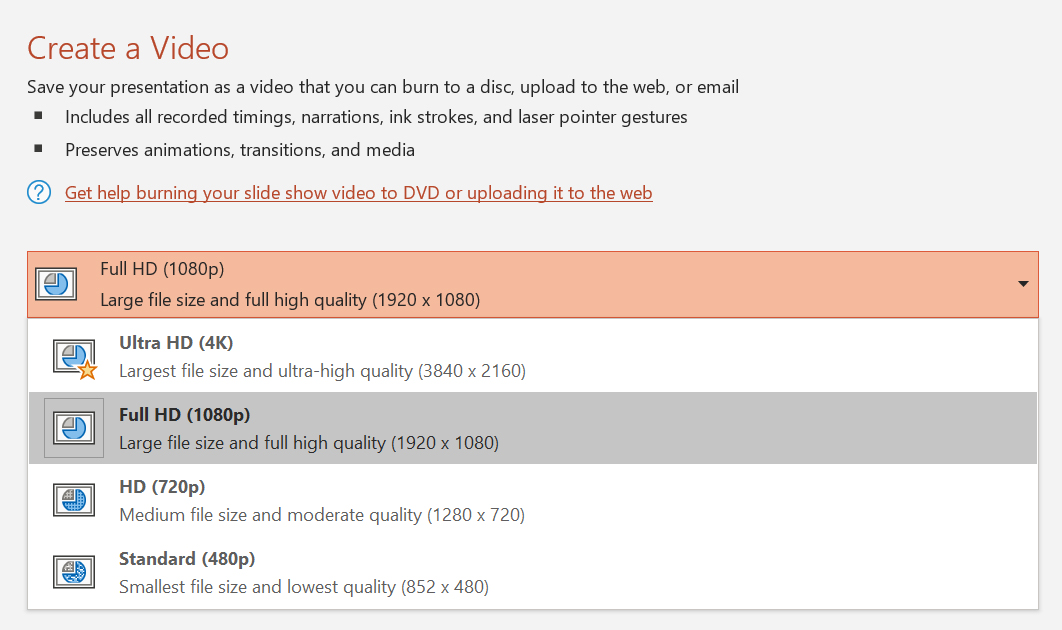
- In the first drop-down box under the Create a Video heading, select the video quality you want, which pertains to the resolution of the finished video. The higher the video quality, the larger the file size. HD Quality will be more than adequate.

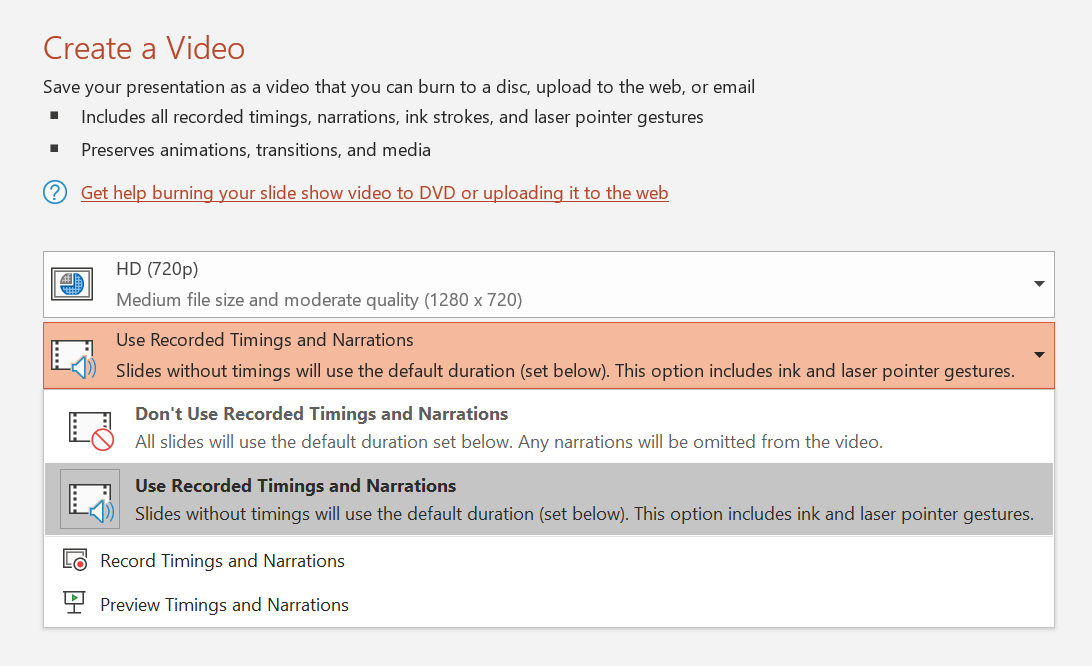
- The second drop-down box under the Create a Video heading tells whether your presentation includes narration and timings. (You may switch this setting if you like.)

- Click on Create Video to complete the process.
Sharing your recording with the Learning Enhancement and Support Team
You can notify the Learning Enhancement and Support team that you have made a recording at help@hyms.ac.uk. We will then be able to transfer your recording to the Echo360 platform and share your content in Blackboard, as required.