Guide Overview
 The Phase II HYMS MB BS personal timetable displays essential timetable information. All Phase II students must read this guidance to ensure they can access their personalised timetable.
This guide will explain how to:
- Step 1: access the Phase II HYMS MB BS personal timetable and view live timetable information
- Step 2: add the HYMS MB BS personal timetable to an Office 365 HYMS email account calendar (web browser)
- Step 3: view the HYMS MB BS personal timetable on a mobile phone
- Additional step: resolve syncing issues in third party calendars (Office 365, viewing from a phone)
Step 1: access the Phase II HYMS MB BS personal timetable and view live timetable information
- Click on the following link to access your timetable and timetable link; https://webapps.hyms.ac.uk/mytimetable.
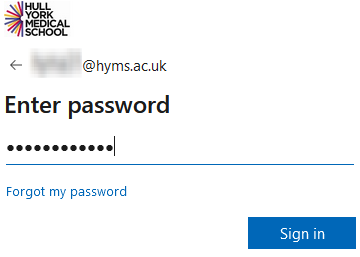
- Authentication is via HYMS Office 365 account details. Enter your HYMS email address in the format ‘hyxxxx@hyms.ac.uk’.

- Then enter your HYMS password. This is the same password you use to log in to all HYMS school systems.

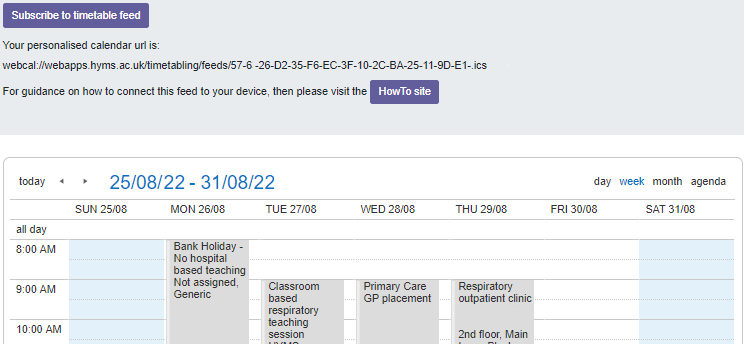
- You will then be redirected back to your live timetable view. Please see the below example screenshot of how content will appear.

Step 2 and 3: add the HYMS MB BS personal timetable to an Office 365 HYMS email account calendar (web browser) and view on a phone
Please add the HYMS MB BS personal timetable to Office 365 before then attempting to view on a phone.
- Access the timetable as described above.
- Highlight and copy your personalised timetable link, as shown in the screenshot below.

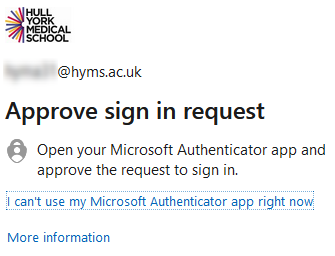
 Log in to your HYMS Office 365 account at the following link; https://login.microsoftonline.com, and navigate to the Office 365 calendar. See the above guidance in Step 1 for entering your Office 365 details / using MFA.
 From the left-hand side panel in the Office 365 calendar view, click on add calendar. Then select subscribe from web.
- Paste the HYMS MB BS personal timetable link into the provided field and name it in the space below (such as HYMS Calendar). Choose to ‘add to my calendars’ from the drop-down list. To finish, click on import.
 Back in the Office 365 calendar view, your HYMS timetable will appear in the left-hand side panel, under My calendars.
 Option 1: Once you have added the timetable to HYMS Office 365 in a browser, add the Outlook app to your phone. The Outlook app allows you to view HYMS Office 365 emails and calendars.
Option 2: Once you have added the timetable to HYMS Office 365 in a browser, add your HYMS email account to your phone and then choose to also add your HYMS email calendar to your phone’s calendar.
*Some devices may also prompt directly to add the timetable link to the phone’s calendars. You can try this by accessing the timetable link from your phone in a browser (see Step 1). Select the link and choose to subscribe if prompted by your phone.
You may need to then go to your calendar menu and check your HYMS email calendar and / or HYMS timetable are selected to be visible. In your phone’s calendar it may not specify the timetable to check / uncheck, but includes it if the overall HYMS email account is selected (ticked green box in example image below).
For both options, please see the following page for guidance on adding the Outlook app for iOS and Android phones (Step 3) ; Installing the Outlook App.

Additional step: resolve syncing issues in third party calendars (Office 365, viewing from a phone)
- Allow a little time for content to sync. This may vary depending on the device manufacturer, the available connectivity, and when content was added to the timetable. As stated above, we cannot guarantee how often third party calendars will sync with the timetable. Furthermore, once content is added to your timetable there may be a delay in it appearing in the student view of content, depending on when automatic updates to the timetable have run. Timetable content is also gradually released block by block.
- If only some content is missing, contact the session organiser and check that all content has in fact been added to your timetable. Also check information has not been communicated to you via an alternative method (such as a link in a Blackboard announcement or an email, or an invitation via your Teams calendar).
- Ensure you have correctly copied and pasted the timetable link and followed the steps above. You do not need to add the timetable again for a new academic year, however, if you encounter issues try removing the timetable link from your calendar / device and repeating the steps above.
- If the timetable is showing but the timings are incorrect, please check your settings. For your Outlook calendar, please navigate to your email settings/ view all Outlook settings/ general/ language and time. Check the time zone is set to Dublin Edinburgh Lisbon London. For your phone, please navigate to your email settings and check the time zone is also set to Dublin Edinburgh Lisbon London. Also check the overall time zone settings on your phone.
- Please be aware this is example guidance only. Some device models / older models may not support all of the steps detailed here. We also suggest searching for online support for your specific device. Please also see the following additional support pages; Microsoft Office support and Apple support.
Once you have tried the above steps, please contact help@hyms.ac.uk for further support. Please clarify what content is missing (all content or only some content) with some example dates / times / sessions. Please also refer to your live timetable feed and / or contact the relevant session organiser / the programme delivery team to be provided with session details in an alternative format.


