This article provides a video and also an overview of how to export a recording using the SMOTS system.
Video walkthrough
Step by step instructions
Please note the login instructions are now different for Hull and York based tutors. Please choose the correct location below for specific login instructions
- Hull based Tutors
- York based Tutors
 Login to the computer using your Hull username and password
- Open the SMOTs Control Centre application.
- Click on the Login with Windows button.

- Login to the computer using your University of York username and password (in the format of ab123)
- Open the SMOTs Control Centre application.
- Click on the Login with Windows button
and then enter your University of York username and password into (in the format of ab123) when prompted and then click on OK:
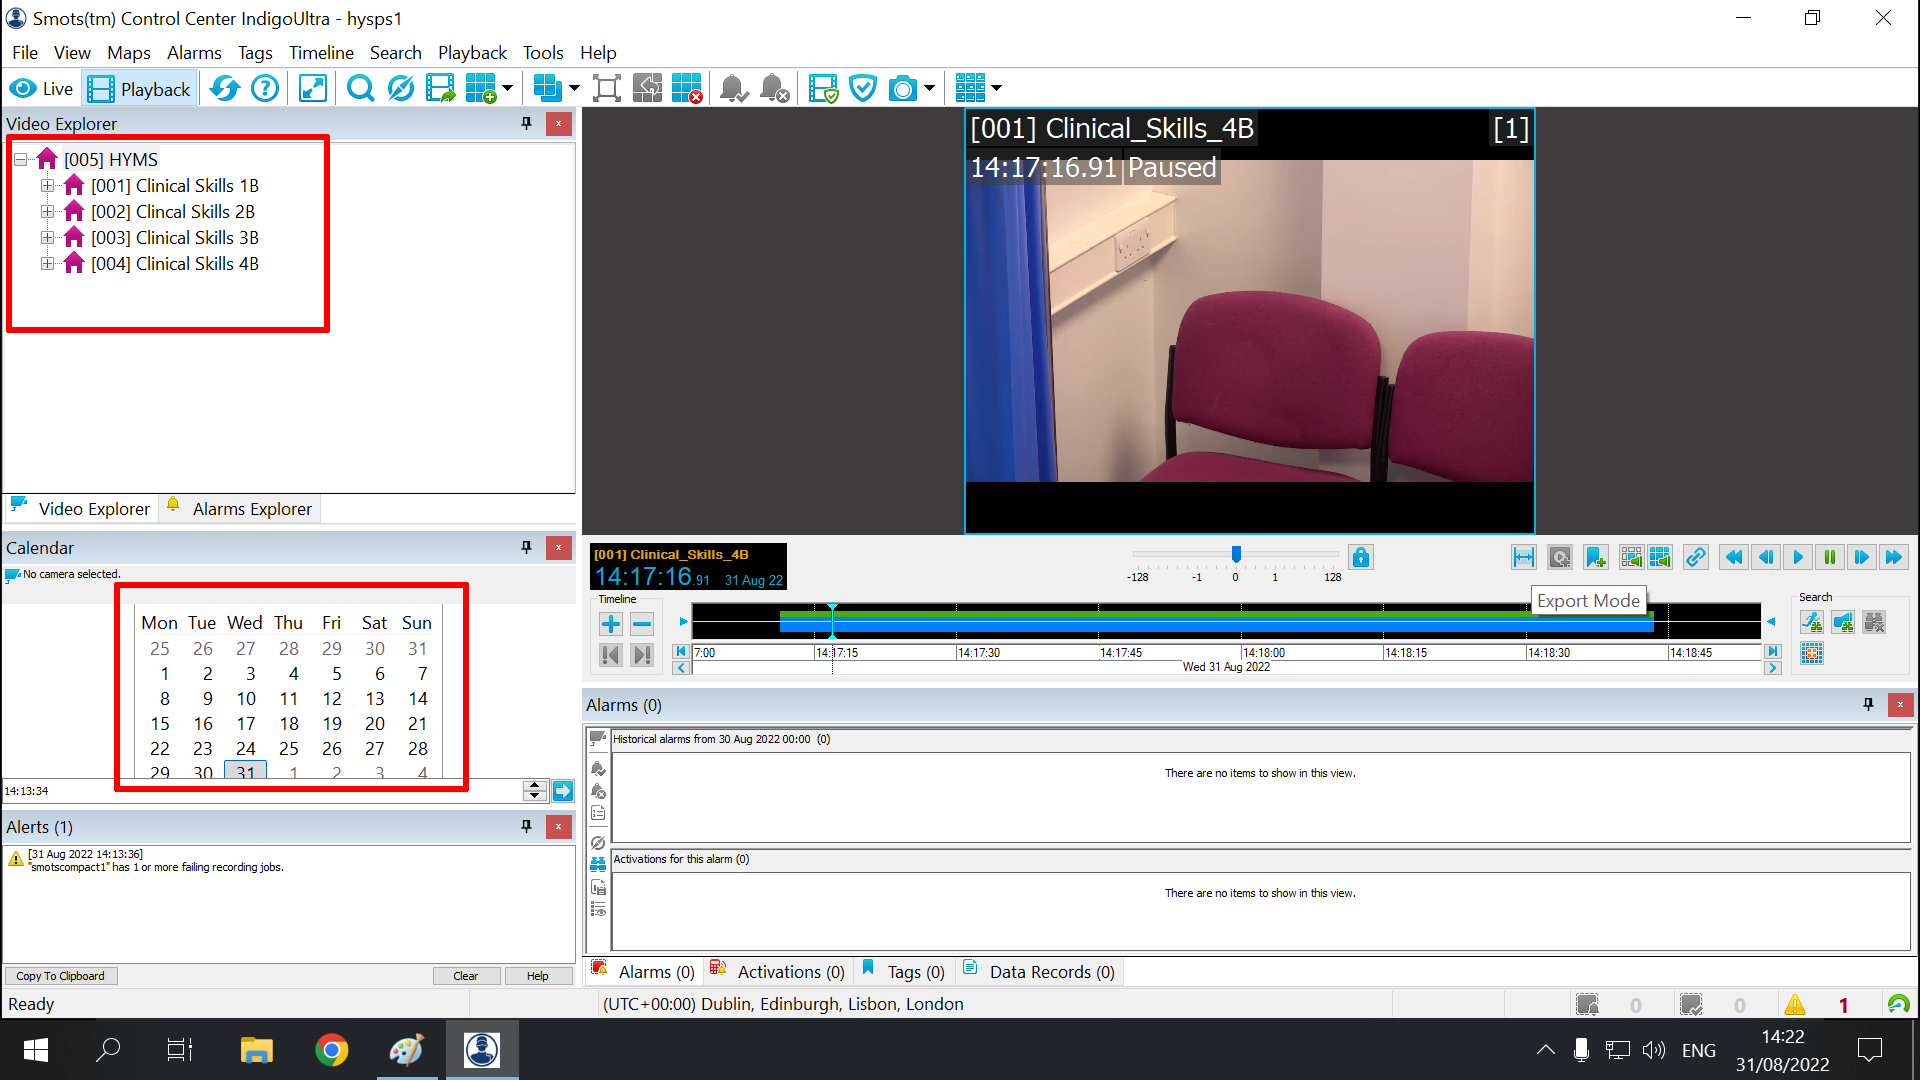
- Select the correct camera for the room you wish to view and then using the calendar select the date to see recording from that day

- Using the timeline locate the clip you wish to export. To move the timeline simply click on it and drag it with your mouse. To zoom in or out of the timeline use the plus (+) and minus (-) buttons to the right of the timeline. Recordings appear on the timeline as green and blue coloured rectangles. Where the timeline is coloured black there are no recordings available

- To play the recording click on the green and blue rectangle and the playhead will automatically jump to that point. If you then click on the play button (located just above and to the right of the timeline) the clip will then play from that point. To pause playback click on the pause button

- When you have identified the start and end time of your recording click on the ‘Export Mode’ button just above the timeline.

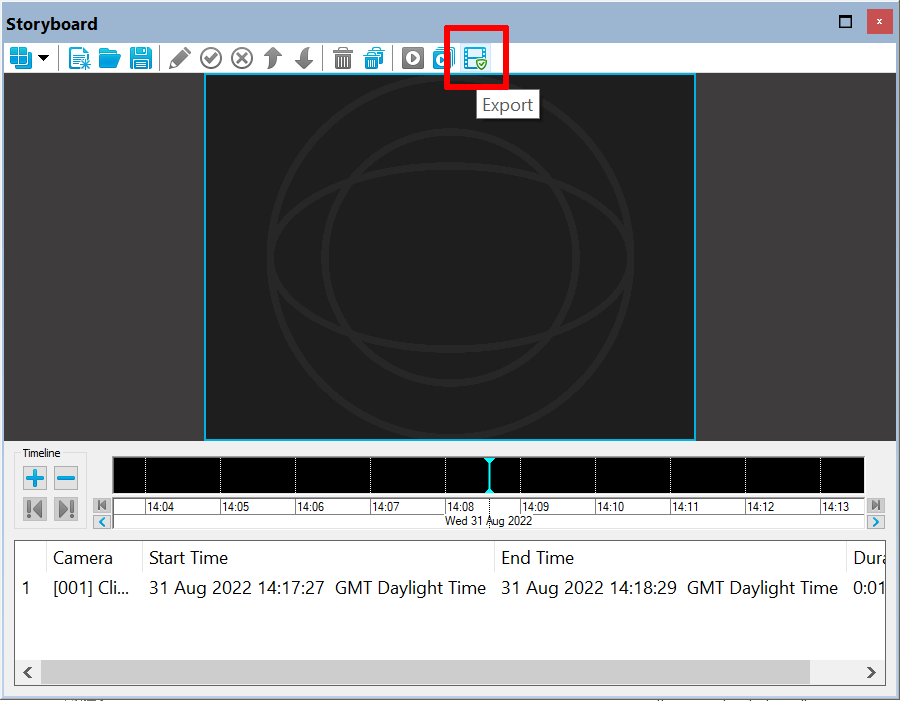
- You will now see two yellow bars, one to the left and one to the right and the content outside these bars is greyed out. You now need to click on the yellow bar at the left and drag this to the start point and then click on the yellow bar to the right and drag this to the end point of your clip. Once selected then click on the second button the left which is labelled ‘add to storyboard’

- The Storyboard window will pop-up and the clip you have specified will now be for export. To complete the export process click on the Export button on the top right of the menu bar


- You will then need to provide a name and location in order to export your footage.
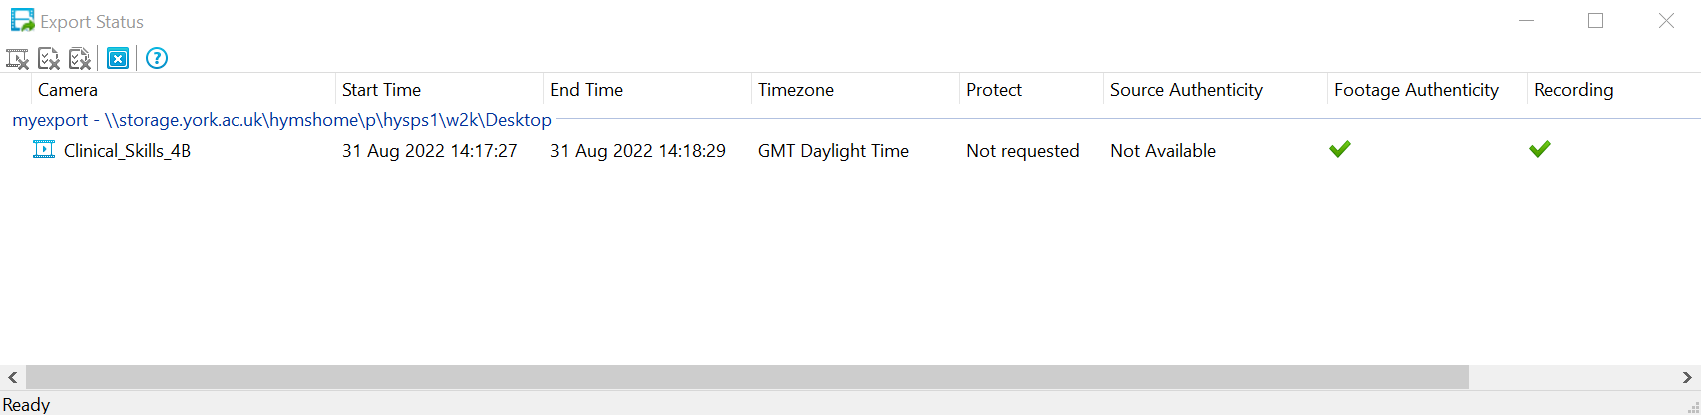
- The Export Status window will then show you the status of your export and will confirm when the export is complete

- Your recording will be exported as .mp4 file and will be available in the folder names ‘footage’ in the downloaded folder
- We strongly recommend that you review the exported recording before sharing this with anyone