Guide Overview
Here’s a short guide to help you setup and resolve any issues that you might have when you connect your laptop to a docking station.
Getting Started
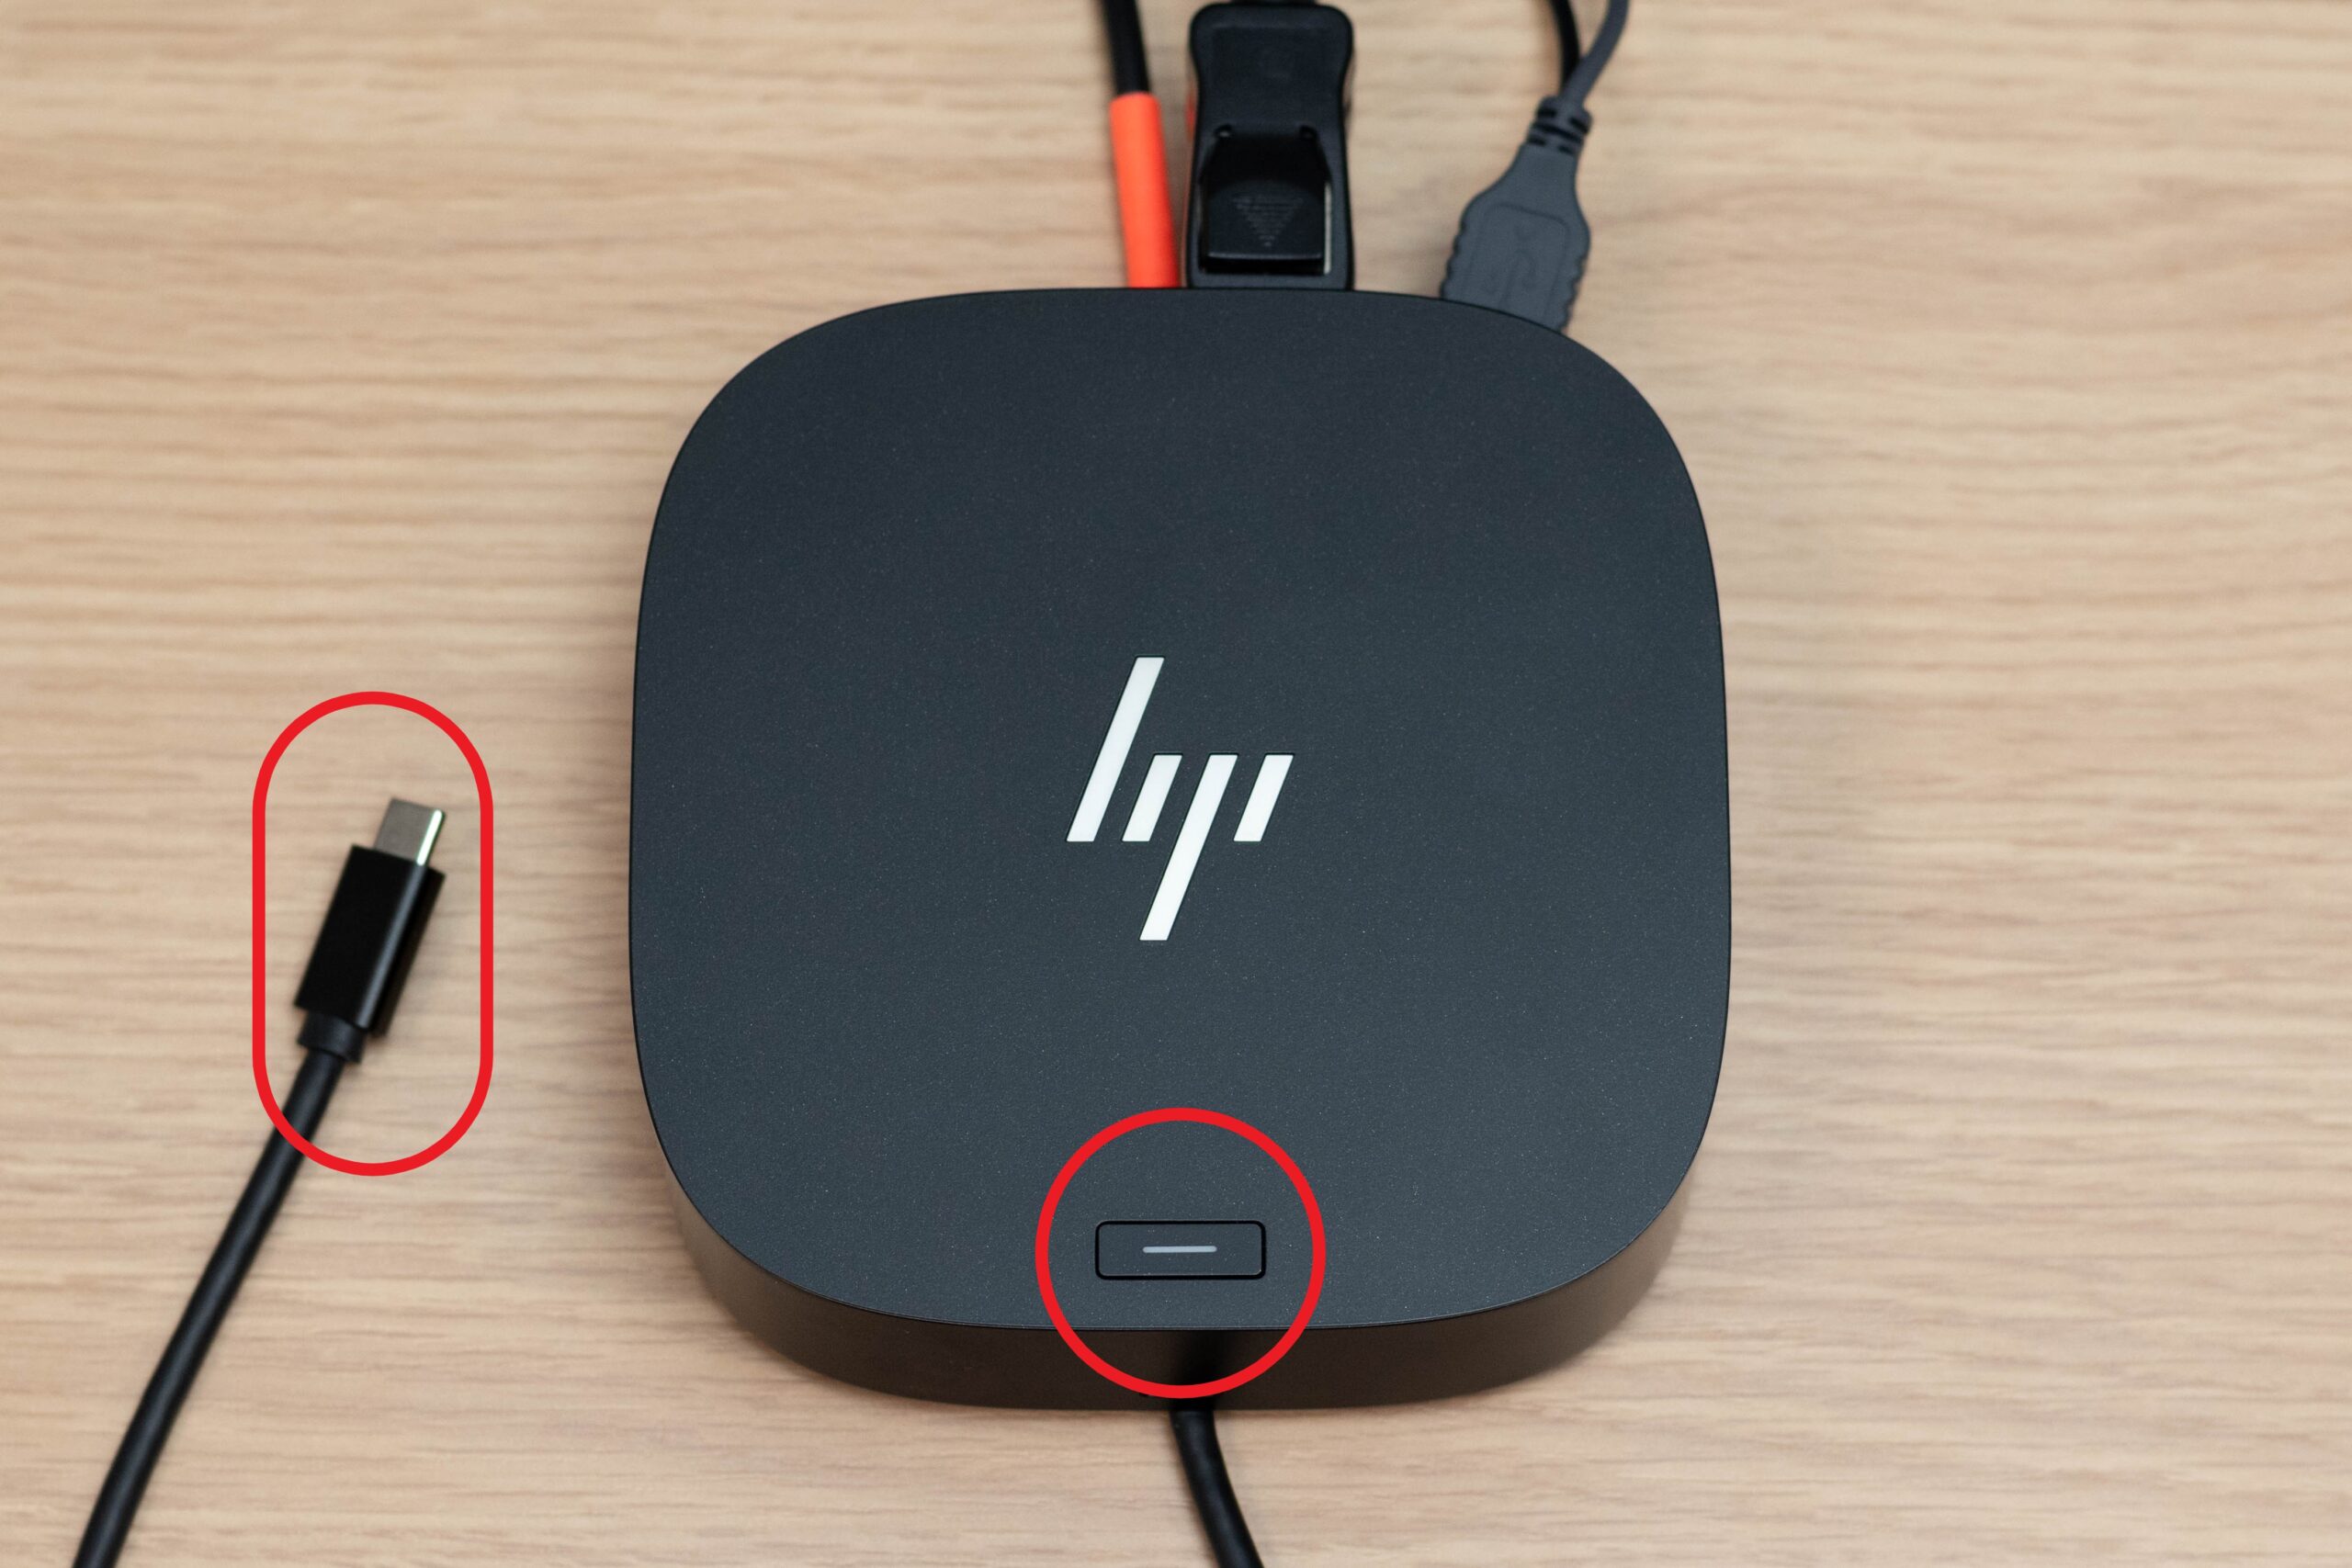
To connect your laptop to the docking station, find the loose end of the USB-C cable and plug it into the USB-C port of your laptop. If your laptop was powered off when you connected the cable, press the power button on docking station. The power button’s light should illuminate.
- Lenovo
- HP
- Dell


Display Settings
To provide the best user experience, you may need to alter the configuration of your displays within your laptop’s Display Settings. You should only have to configure the display settings once for each new dock that you connect to.
Connect your laptop to the docking station and power it on. Then, right-click on the desktop and select Display Settings:
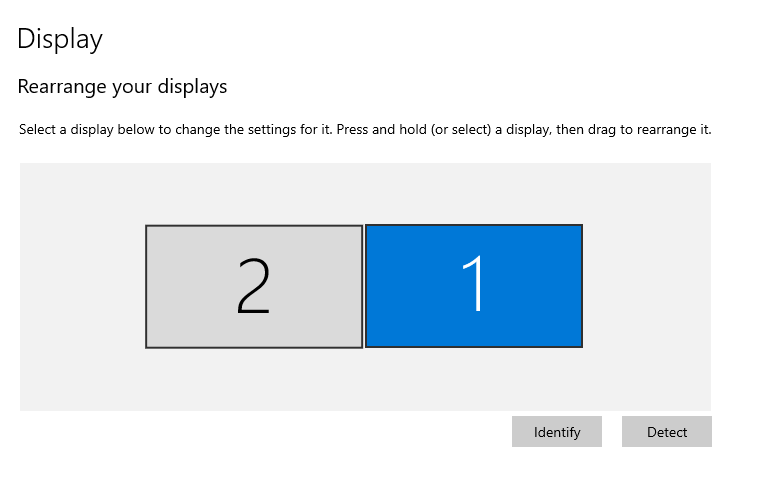
Rearrange your displays
All monitors connected to your docking station will appear in the window as shown below. In this example, we have 2 monitors connected. You may have a third display visible if you connected your laptop to the docking station with its lid open. To select a monitor to see and change its configuration, click on the monitor’s number in the window to highlight it in blue. Rearranging the monitors in Display Settings tells the laptop the physical position of these monitors in relation to each other.
 To rearrange the monitors in Display Settings:
- Click Identify – Each connected monitor will now display a number
- Arrange the displays in the window to reflect their physical location
- Drag and drop the highlighted display in the window above until its position matches its physical location
- In the example above, Monitor 2’s physical location is to the left of Monitor 1
- Click Apply
Additional Configuration
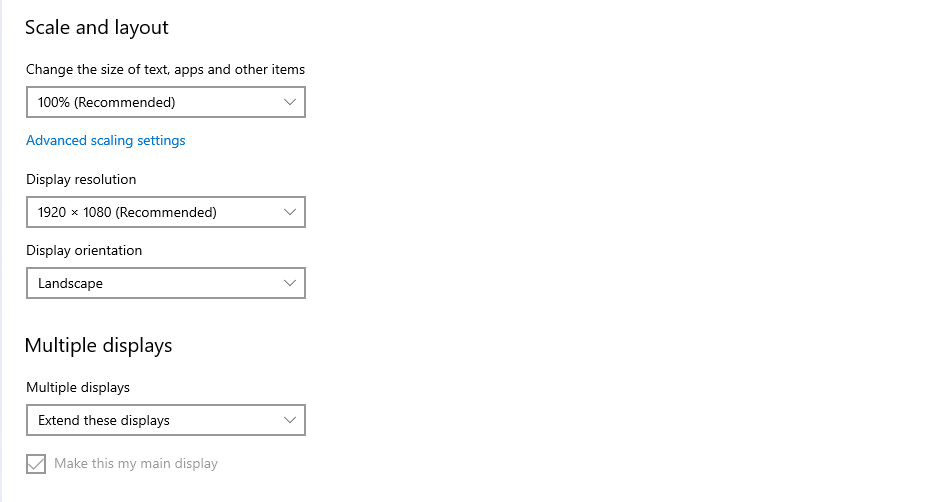
To configure each monitor’s settings, click on the monitor in the window above to highlight it in blue. You will need to select and configure each monitor individually.
Ensure the following:
- Display resolution is set to the Recommended option
- Multiple displays is set to Extend these displays
Docking Station Power Cable
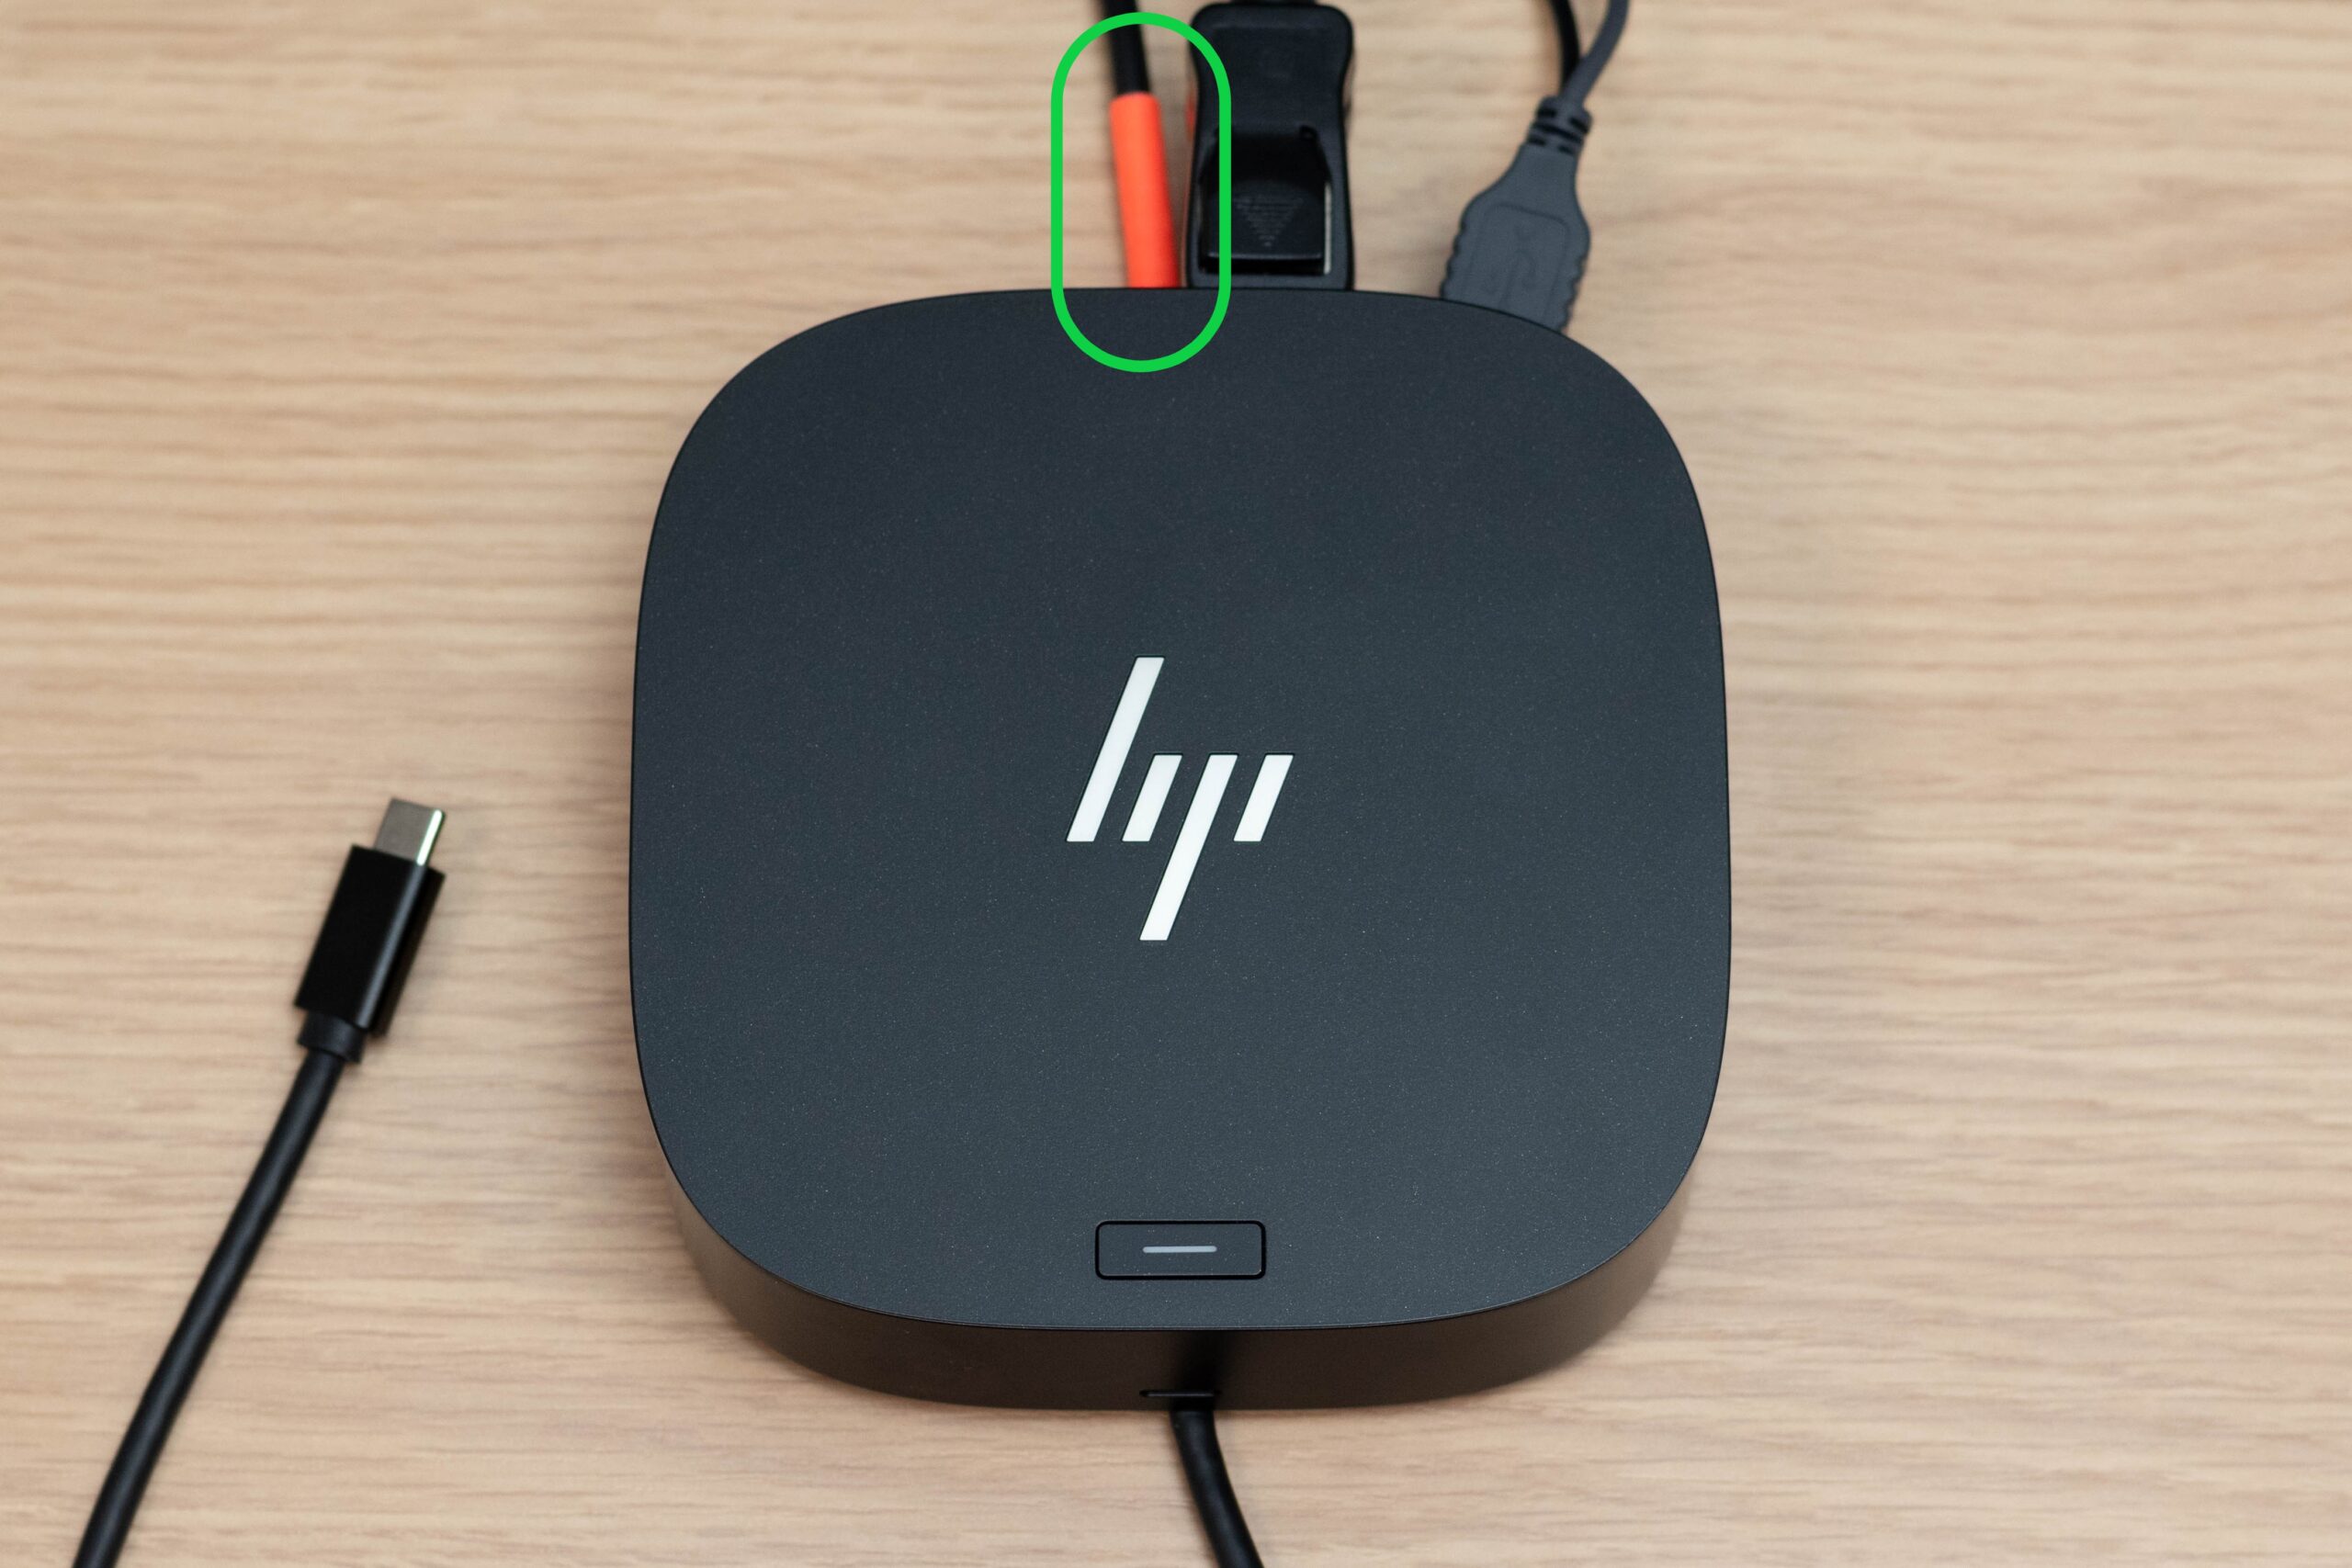
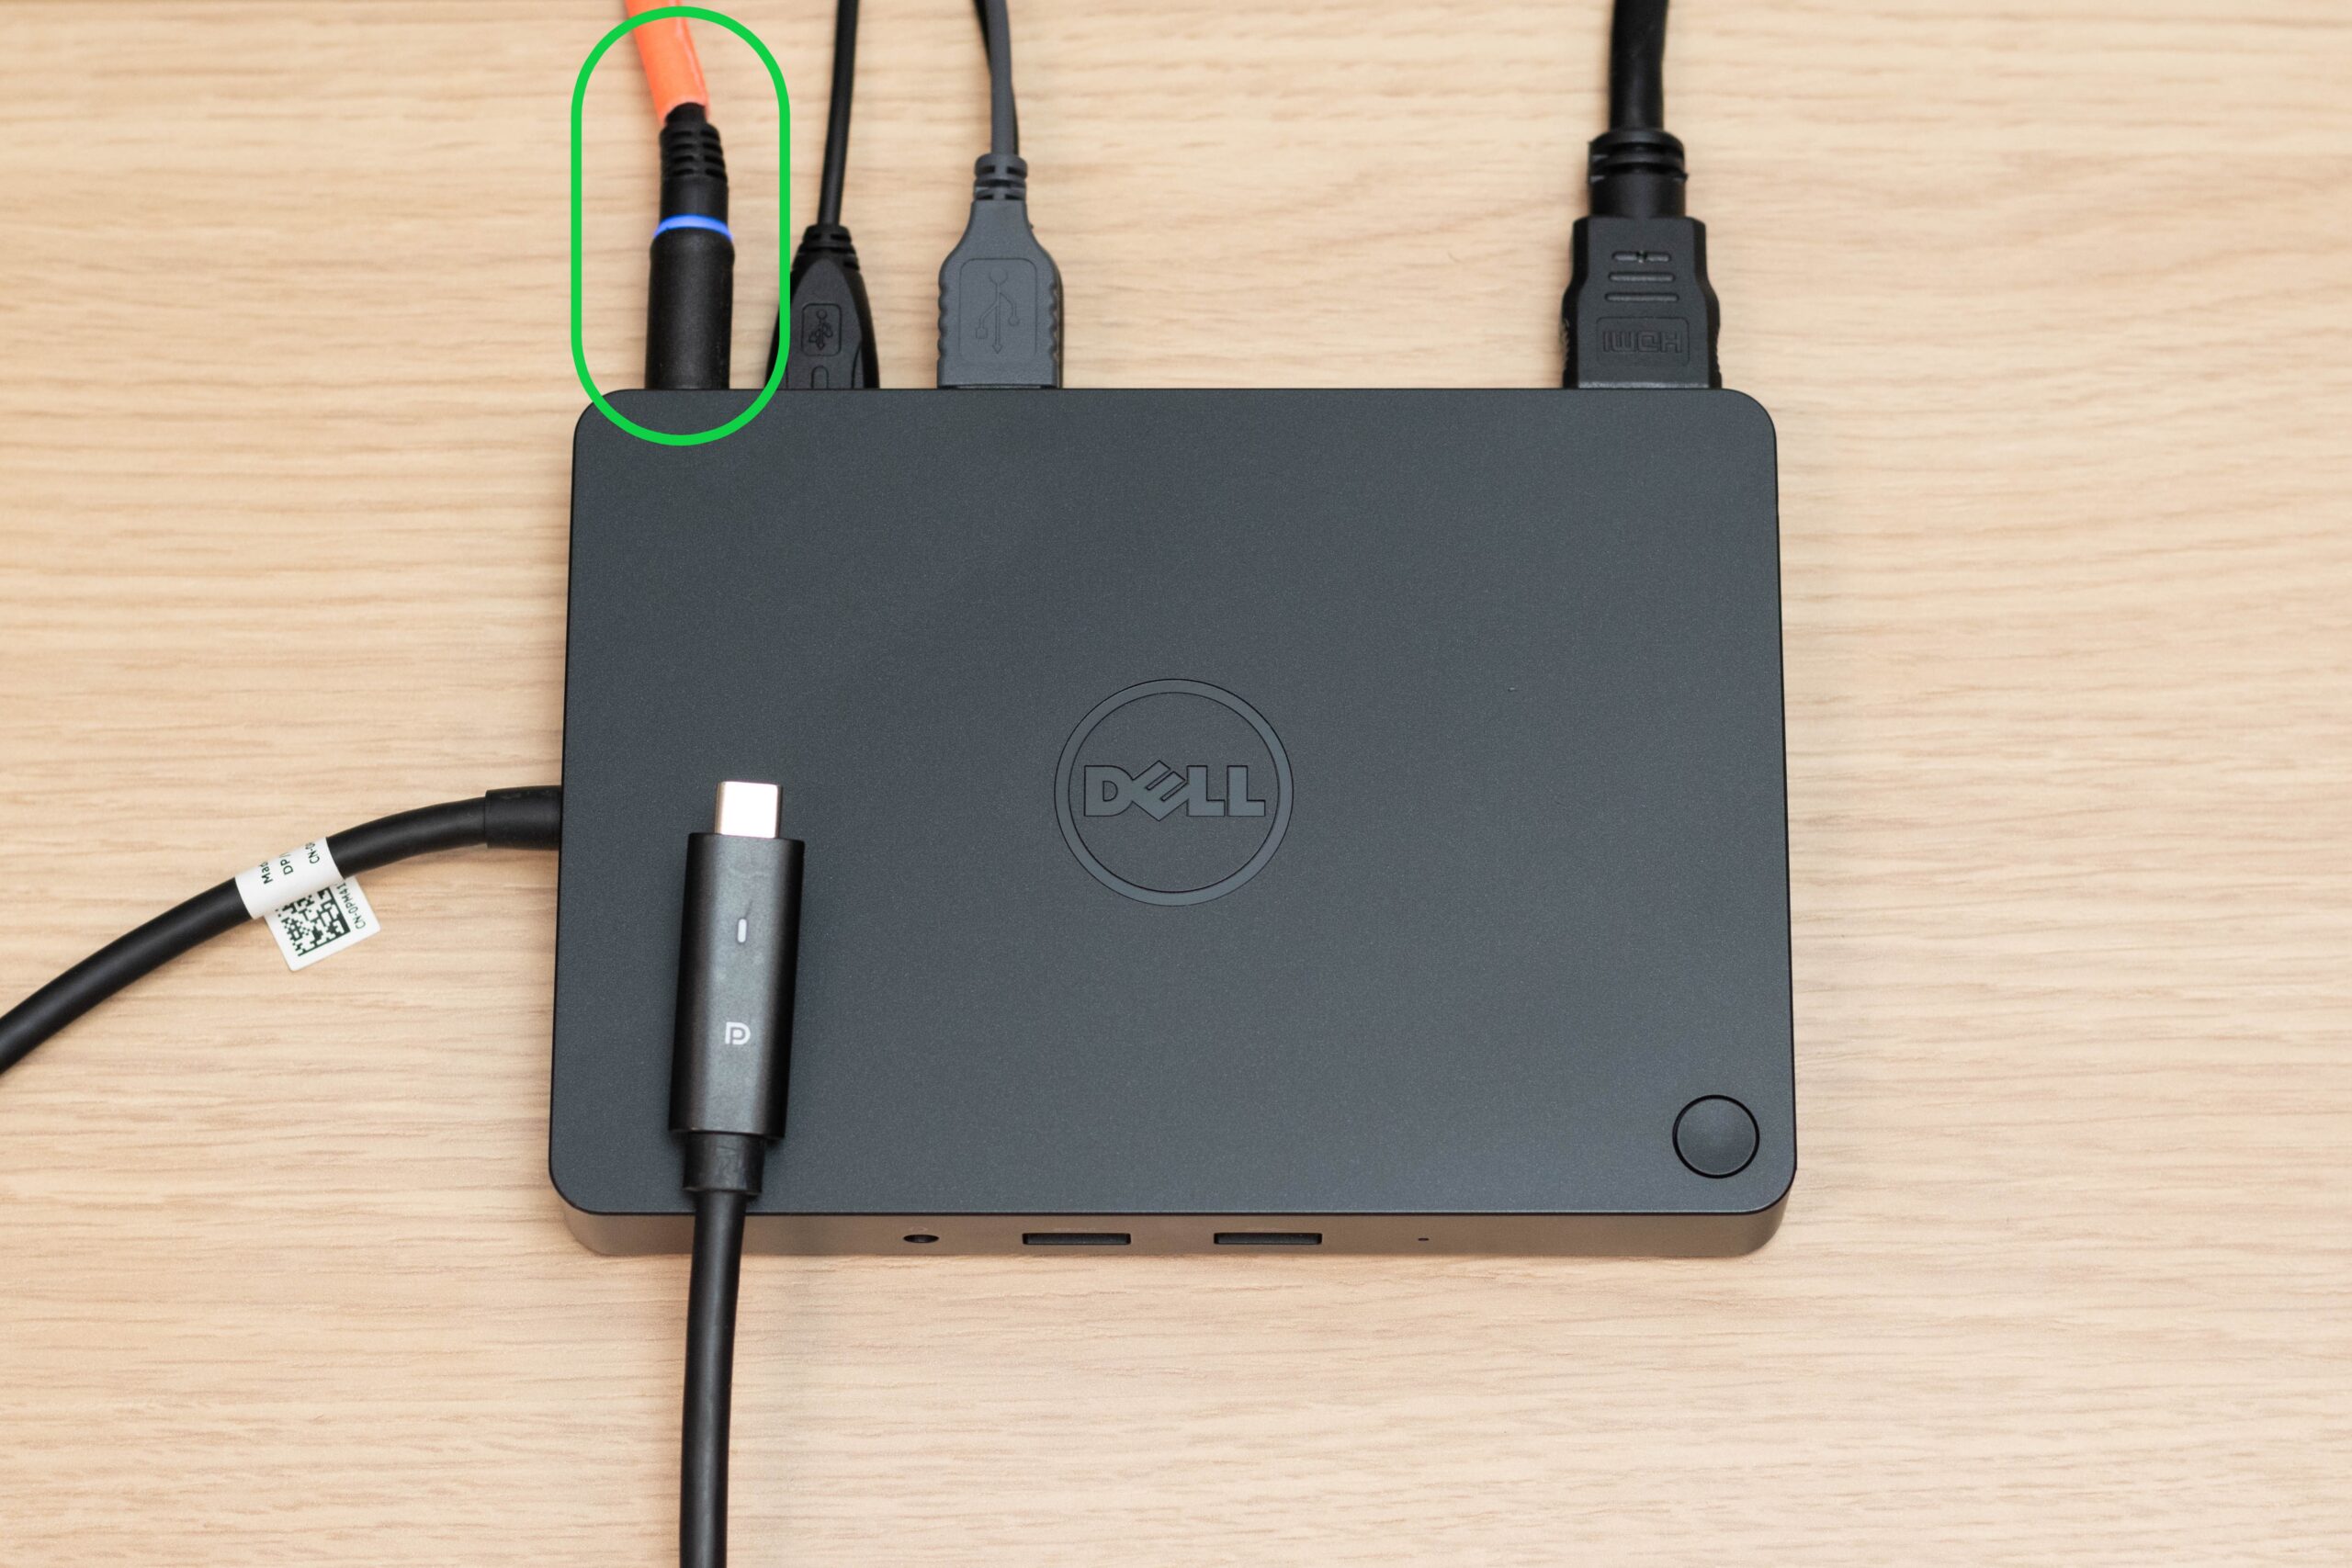
To help you troubleshoot any issues with your docking station, the power cables on your docks have been marked with a band of fluorescent orange tape. When working through some of the solutions below, use these photos to help you identify the location of your docking station’s power cable:
- Lenovo
- HP
- Dell

I have no internet connection
Issue
When you connect your device to the docking station, it should attempt to connect to the internet over the wired network. Sometimes, it may fail to connect, and in doing so, inhibits your ability to connect to eduroam as well.
Solution – Disconnect the ethernet cable
In this instance, disconnect the ethernet cable from the back of the docking station and attempt to connect to eduroam.
My monitors and USB peripherals don’t work
Issue
When you connect your laptop to the docking station and you have difficulty displaying an image on one or both monitors and some or all your USB peripherals don’t work, like your keyboard, mouse, and webcam, then try restarting the docking station.
Solution – Restart the docking station
- Save your work
- Unplug the power cable from the back of the docking station
- Count to 10
- Reinsert the power cable
All monitors display the same thing
Issue
If your displays appear mirrored, with the same display on each monitor, navigate to your device’s Display Settings to adjust the configuration.
Solution – Display Settings
- Right-Click on your desktop
- Select ‘Display settings’
- Scroll down to see options for ‘Multiple displays’
- Select ‘Extend these displays’ in the drop-down list
- Rearrange the order of displays as needed:
- Scroll to the top and click ‘Identify’
- Rearrange the position of the displays in the window
- Click ‘Apply’
- Configure the main display:
- Select the display in the window that you wish to configure as your main display
- Scroll down to see options for ‘Multiple displays’
- Select the checkbox to ‘Make this my main display’
I have no display on one monitor
Issue
If your USB peripherals appear to work as expected, but one of your monitors has no display, this may be caused by one or more issues. Try the solutions below, listed in order of speed and ease.
Solution – Monitor Cables
- Check the video cable is connected to both the monitor and docking station
- Check the power cable is connected to the monitor
- Ensure the monitor is turned on
Solution – Restart the docking station
- Save your work
- Unplug the power cable from the back of the docking station
- Count to 10
- Reinsert the power cable
Solution – Display Settings
- Right-Click on your desktop
- Select ‘Display settings’
- Scroll down to see options for ‘Multiple displays’
- Select ‘Extend these displays’ in the drop-down list
- Rearrange the order of displays as needed
- Scroll to the top and click ‘Identify’
- Rearrange the position of the displays in the window
- Click ‘Apply’
- Configure the main display
- Select the display in the window that you wish to configure as your main display
- Scroll down to see options for ‘Multiple displays’
- Select the checkbox to ‘Make this my main display’
Neither of my monitors are working
Issue
No display showing on both monitors connected to the docking station may be caused by several different things. Look through the solutions below to troubleshoot the issue:
Solution – USB Cable & Docking Power
- Ensure the USB Cable is connected to the docking station and your laptop
- Check that power is going to the docking station
- Verify that the docking station has been turned on
Solution – Monitor Cables
- Check the video cable is connected to both the monitor and docking station
- Check the power cable is connected to the monitor
- Ensure the monitor is turned on
Solution – Restart the docking station
- Save your work
- Unplug the power cable from the back of the docking station
- Count to 10
- Reinsert the power cable