
This article explains how to setup Multi-Factor Authentication on your Hull York Medical School IT account. Multi-Factor Authentication (MFA) provides an additional layer of security on top of your username and password when you access university resources online. Further information on MFA and why it’s required can be found on our Multi-Factor Authentication (MFA) guide.
How to setup MFA
Follow these simple steps to enable Multi-Factor Authentication on your HYMS account:
Step 1 – Install the Microsoft Authenticator app on your mobile device
To download the Microsoft Authenticator App on your phone – please visit either the Google Play or Apple Store:
Step 2 – Setup the Microsoft Authenticator app
You will need to complete some of these steps on your computer and some on the Microsoft Authenticator App.
Open a web browser on your computer and log into https://m365.cloud.microsoft/ with your HYMS account. Enter your HYMS email address (in the form hyxxxx@hyms.ac.uk) and password.
Click Next to setup additional security information.

Click Next on your computer to confirm you have installed the Microsoft Authenticator App on your mobile phone.

Click Next on your computer and the following screen will be displayed:

Click Next on your computer and the following screen will be displayed:

Open the Microsoft Authenticator App (on your mobile phone). Click on the plus (+) icon in the top right hand corner of the app, to add your account:
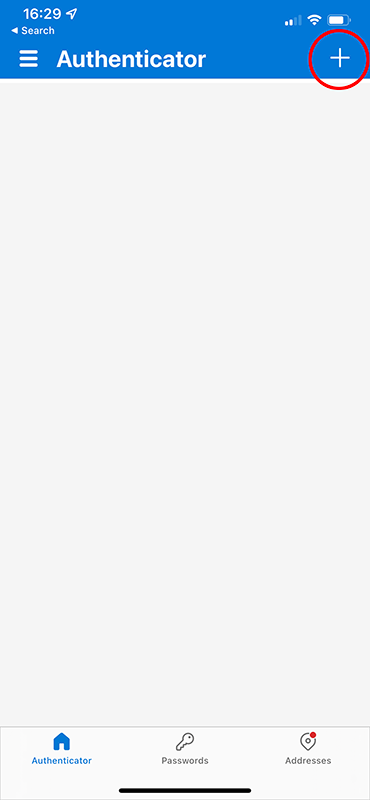
Select Work or School account and then Scan QR code (As displayed above):

With your mobile phone scan the QR code that appears on the computer screen with the Authenticator app and then click Next. At this point it will send a notification to your phone asking you to approve your authentication. When you scan the QR code the following message will appear.

When you have successfully added MS Authenticator to your account you will see the screen below.

Click Done to add a contact email address.
Step 3 – Add contact Email address for password change\reset
Add a contact email address and Click Next. (A code will be sent to your email account).

Enter the code received by your email account and Click Next.

After successful entry of the code the screen below will be displayed Click Done.

Confirming the setup of authentication methods
Once you have registered your two authentication methods you will see the following confirmation screen:

Going forward you will receive a notification (a request to approve your sign-in) when you access HYMS systems that are protected by MFA.